
Whether you recently bought a sleek, new flat-screen TV, or you want to finally get rid of that clunky media cabinet, mounting your TV is a quick way to save space, improve the overall aesthetics of a room and boost your TV viewing experience.
At first glance, it’s a project that can appear somewhat intimidating. How do you know that you’ve attached your TV to the mount correctly? And once it’s on the wall, how can you be sure that it’s secure and isn’t going anywhere?
Don’t worry, we’re here to walk you through mounting your TV step-by-step. Watch the video below to see Kurt install a full-motion TV mount and read on to learn some of the things you should consider before you get started mounting your TV.
If you’re using a SANUS mount, you’ll be happy to know that mounting your TV is just a 30-minute project. You’ll get a clear installation manual with images and text, install videos and U.S.-based installation experts, who are available 7-days a week, to make sure you are successful in mounting your TV and satisfied with the finished product.
Deciding Where to Mount Your TV:
Consider your viewing angles before choosing the location to mount your TV. You don’t want to get your TV mounted to the wall only to find that the location is less than ideal.
If you could use some help visualizing where your TV will work best, take a large sheet of paper or cardboard cut to the approximate size of your TV and attach to the wall using painter’s tape. Move it around the room until you find a spot that works best with your furniture arrangement and layout of your room.
At this stage, it is also a good idea to confirm the stud location within your walls. Knowing whether you will be attaching to a single stud or dual studs will help you pick the right mount. It is important to note, many mounts offer the ability to shift your TV left or right after installing, so you can place your TV exactly where you want it – even if you have off-center studs.
Choosing the Right Mount:
In addition to selecting the right place to mount your TV, you’ll also want to put some thought into what type of TV mount you’ll need. If you take a look online or go to the store, it can seem like there are a ton of mount types out there, but it all really comes down to three distinct mount styles that offer different features based on viewing needs:
Full-Motion TV Mount:
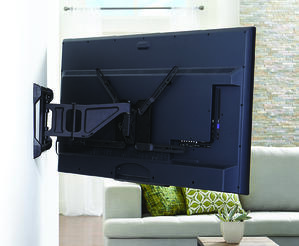
Full-motion TV mounts are the most flexible type of mounts. You can extend the TV out from the wall, swivel it left and right and tilt it down.
This type of mount is ideal when you have multiple viewing angles from within a room, you have limited wall space and need to mount your TV away from your main seating area – like in the corner, or if you regularly need access to the back of your TV to switch out HDMI connections.
Tilting TV Mount:
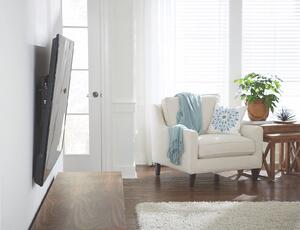
A tilting TV mount lets you adjust the degree of tilt on your television. This type of mount works well when you need to mount a TV above eye level – like above a fireplace, or when you’re dealing with glare from either an indoor or outdoor light source. They also create space to attach streaming devices behind your TV.
Fixed-Position TV Mount:
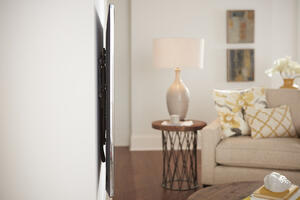
Fixed-position mounts are the simplest mount type. As the name conveys, they are stationary. Their main benefit is providing a sleek look by placing the TV close to the wall. Fixed-position mounts work well when your TV can be mounted at the optimal viewing height, your viewing area is directly across from the TV, you aren’t dealing with glare and won’t need access to the back of your TV.
Mount Compatibility:
After choosing the mount type you want, you’ll need to make sure the mount fits the VESA pattern (mounting pattern) on the back of your TV.
You can do this by either measuring the vertical and horizontal distance between the mounting holes on your TV, or you can use the tool. To use MountFinder, simply plug in a few pieces of information about your TV, and then MountFinder will provide you with a list of mounts that are compatible with your TV.
Make Sure You Have the Necessary Tools:
Before getting started, be sure that you have everything you need and be sure to follow the installation manual that comes with your mount. If you’ve purchased a SANUS mount, you can reach out to our U.S-based customer support team with any product-specific or installation questions you may have. They’re available 7-days a week to help.
To install your mount, you’ll need the following tools:
• Electric drill
• Phillips head screwdriver
• Tape measure
• Level
• Pencil
• Drill bit
• Stud finder
• Hammer (concrete installations only)
Step One: Attach the TV Bracket to Your TV:
To get started, select the bolts that fit your TV, and don’t be overwhelmed by the amount of hardware that is included – you won’t use it all. With all SANUS TV mounts, we include a variety of hardware that is compatible with the majority of the TVs on the market including Samsung, Sony, Vizio, LG, Panasonic, TCL, Sharp and many, many more brands.
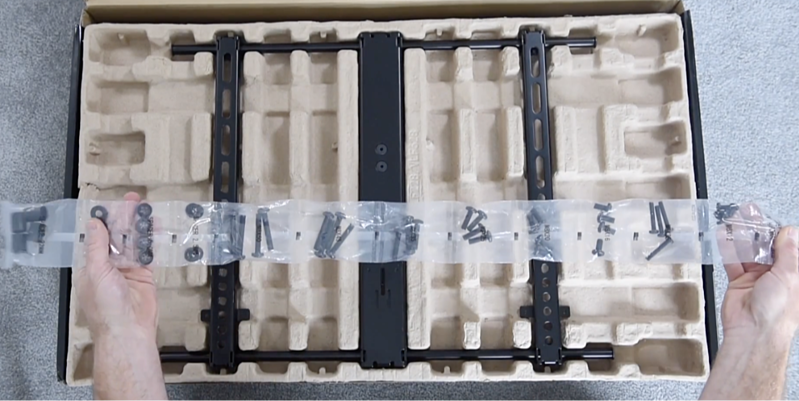
Note: If you need additional hardware, contact our customer support team, and they will send you the necessary hardware at no charge.
Now, place the TV bracket so it aligns with the mounting holes on the back of your TV and thread the appropriate length screw through the TV bracket into your TV.
Use your Phillips head screwdriver to tighten the screw until it’s snug, but be sure not to overtighten as this could cause damage to your TV. Repeat this step for the remaining TV holes until the TV bracket is firmly attached to your TV.
If your TV doesn’t have a flat back or you want to create extra space to accommodate cables, use the spacers included in the hardware pack and then proceed to attaching the TV bracket to your TV.
Step Two: Attach Wall Plate to the Wall:
Now that Step One is complete, we’re moving on to Step Two: attaching the wall plate to the wall.
Find the Right TV Height:
For optimal viewing from a seated position, you’ll want the center of your TV to be approximately 42” from the floor.
For help finding the right TV mounting height, visit the SANUS HeightFinder tool. Simply enter the height of where you want your TV on the wall, and HeightFinder will tell you where to drill you holes – helping remove any guess work from the process and saving you time.
Locate Your Wall Studs:
Now that you know how high you want your TV, let’s find your wall studs. Use a stud finder to find the location of your studs. Generally, most studs are either 16 or 24 inches apart.
Attach the Wall Plate:
Next, grab the SANUS wall plate template. Place the template on the wall and align openings to overlap with stud markings.
Now, use your level to make sure your template is… well, level. Once your template is level, adhere to the wall and grab your drill, and drill four pilot holes through the openings on your template where your studs are located.
Note: If you’re mounting into steel studs, you’ll need special hardware. Give our customer support team a call to get what you need to complete your installation: 1-800-359-5520.
Grab your wall plate and align its openings with where you drilled your pilot holes, and use your lag bolts to attach the wall plate to the wall. You can use an electric drill or socket wrench to complete this step. And just like with the TV bracket and your TV in Step One, be sure not to overtighten the bolts.
Step Three: Attach the TV to the Wall Plate:
Now that the wall plate is up, it’s time to attach the TV. Since we are showing how to mount a full-motion TV mount, we’ll start this process by attaching the arm to the wall plate.
It’s the moment you’ve been waiting for – it’s time to hang your TV on the wall! Depending on the size and weight of your TV, you may need a friend to help.
Lift your TV onto the arm by first hooking the hang tab and then resting the TV into place. Once your TV is hanging on the mount, lock the TV arm. Refer to your installation manual for specific details for your mount.
And that’s it! With a SANUS full-motion TV mount, you can extend, tilt and swivel your TV without tools for the best view from any seat it the room.
Your mount may have additional features like cable management to route and conceal TV cables along the mount of the arm for a clean look.
Additionally, most SANUS full-motion mounts include post-installation leveling, so if your TV isn’t perfectly level, you can make leveling adjustments after your TV is on the wall.
And if you have a dual-stud mount, you can use the lateral shift feature to slide your TV left and right on the wall plate in order to center your TV on the wall. This feature is especially helpful if you have off-center studs
Hide TV Cords and Components (Optional):
If you don’t want exposed cords below your TV, you’ll want to think about cable management. There are two ways to hide the cords dangling below your TV.
The first option is in-wall cable management, which hides cables within the wall. If you go this route, you will want to complete this step before mounting your TV.
The second option is on-wall cable management. If you chose this style of cable management, you will use a cable channel that conceals cables on your wall. Hiding your cables on-wall is an easy, 15-minute task that can be done after mounting your TV.
If you have smaller streaming devices like Apple TV or Roku, you can hide them behind your TV using a streaming device bracket. It simply attaches to your mount and holds your streaming device neatly out of sight.
There you have it, your TV’s on the wall in about 30 minutes – your cords are hidden away. Now you can sit back and enjoy.
Topics: How To, TV Mount, Video, Full-Motion Mount.
Post time: Aug-15-2022